I've been on a nail polish kick lately and thought that I'd share an easy tutorial with everyone. Hope you enjoy!
Step 1: Make sure that you have clean nails (no oils or polish). Best way to do that is to clean your finger nails with nail polish remover.
Step 2: Apply a base coat to your nails making sure to wrap the edges of your nails. This will help smooth out the ridges of your nails so that the polish will adhere better.
I'm using Avon's Nail Experts Smooth Beginnings as my base coat. One coat will work just fine.
Step 3: Apply nail color. I'd recommend a contrasting color to the mosaic color you choose. Instead of shaking your bottle of nail polish I would suggest rolling the bottle between your hands. This will lessen the chance of creating air bubbles in the polish. Depending on the color you are using you want to do 1 or 2 thin coats. Again, thin coats will lessen the chance of bubbles on your nails. Apply the first coat and let dry completely before applying a second coat. If you apply another coat before it's dry it will also cause bubbles in your manicure. Make sure to wrap the nails to help avoid chipping. If you are like me and can't color inside the lines, you can use a small eyeliner brush and polish remover to clean the edges. I do this nail by nail because the excess comes off cleaner while it's still wet then going back after you are done to clean up.
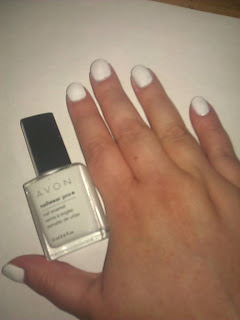
Here I used Avon Nailwear Pro + in French Tip White. I applied 2 coats as one coat is a little too thin to look even.
Step 4: Apply your mosaic polish. You want to apply only one coat of this and work fairly quickly. This polish dries super quick thanks to a special alcohol which is what causes the mosaic effect.
So I used the Avon Mosaic Effects Top Coat in Red Lava. As you can see, it created cracks across the polish to make a mosaic effect.
Step 5: Once dry (which will be very quick), apply a clear top coat. Now the Mosaic Effects says that it's a top coat, but I prefer adding a clear coat on top to seal the edges and really add a shine. It really brings out the sparkle in the polish. Again, wrap the edges to seal the manicure.
I used Avon Nail Experts UV Gloss Top Coat to seal everything and finish off with a shine.
There is your finished manicure! It's a fun quick look with little maintenance. If after a couple days you don't have any chips, I would apply another coat of the top coat to reseal and renew the shine.
Above is the polish I used in order from left to right. All is available through me or my website. I hope you enjoyed this tutorial and feel free to leave me any comments or requests for a new tutorial!
www.youravon.com/melissatennis
darizaa@live.com


